Much of the efficiency of rail transportation comes from the minimal amount of friction created between wheels and rail. But friction also means traction, making important tasks like starting, stopping and climbing hills much more challenging for a train.
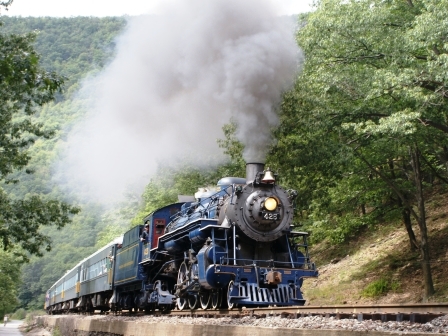
There’s nothing like the sound of a train working hard upgrade.
But the world is not flat, so grades are a part of life for any railroad. A grade is measured by the amount of height gained (rise) divided by a given distance (run). To make grades easier to compute, we often think in terms of a 100 foot run – for model railroads, obviously a smaller measurement is more convenient! So a grade that rises three feet for every 100 feet it travels would be considered a 3% grade.
On a busy mainline, any extended grade over 1.5% is generally considered steep. Grades approaching 2% usually require additional helper engines. Anything over 3% would be exceptionally steep.
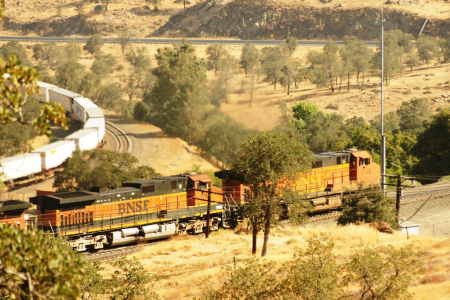
An eastbound BNSF TOFC train passes itself through the famous Tehachapi Loop, showing just how extreme even a 2% grade can be!
Here are a few well-known grades and how they stack up. The numbers given are for the “ruling grade” on the route. The grade may be less than this in some places, but this is the maximum grade the train will encounter and is therefore the grade for which locomotive assignments are made.
- Horseshoe Curve (PRR) – 1.87%
- Sand Patch (B&O) – 2%
- Sherman Hill (UP) – 1.55%
- El Cajon (ATSF, UP) – 2.2%
- Tehachapi Loop (SP, ATSF) – 2%
- Saluda (SOU) – 5.4%
Grades for Model Trains
Since our trains are generally much smaller and lighter than the prototype even in scale proportions, and since our wheels and rails are also proportionally larger allowing more friction, model trains can negotiate slightly higher grades than the prototypes. That being said, keeping grades to a minimum is still in our best interests.
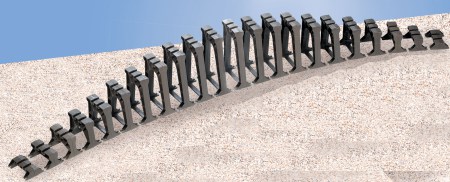
Our graduated trestle set makes it easy to create an even grade with your tubular track.
A generally accepted standard in model railroading is 1 inch of rise for every 4 feet of run. This convenient measurement works out to just over a 2% grade. Unlike the prototypes, the size of trains we typically run can usually handle this grade without any helpers. Grades of 4% (2 inch rise over two feet of run) are still manageable and may be necessary on smaller platforms with over/under “figure 8″ plans and the like. Since you probably won’t be running any 50 car trains on a layout this size anyway, the overall impact is the same.
There is more to building a good grade than just minimizing the slope however. Here are a few more tips to keep in mind while laying out your tracks:
- Curves - Curves can both help and hurt. By adding friction, a curving grade is actually easier to descend than a perfectly straight run – within reason. The same problems you’ll encounter with exceptionally sharp curves and reverse curves (like an “S”)on level ground will be intensified on a grade. It is also a good idea to avoid a sharp curve at the very bottom of a grade where speeds may be greater.
- Transitions - Ideally, your track should transition smoothly from level to grade to level again. Think of the grade as a vertical curve – like the curves in your track the larger the better and kinks = problems.
- Consistency - Try to keep your grade even throughout (excepting those transition areas of course) to allow your trains to maintain a constant speed.
- Switches and Uncoupling Ramps - Avoid putting uncoupling ramps and facing point switches (arranged so that the oncoming train can take either route) on the top, downhill or base of a grade. Unless of course you want to build a working hump yard.
- Speed - If your locomotives have our Odyssey speed control, they will automatically compensate train speed for the grades. Otherwise, you’ll notice a drop in speed going uphill and the opposite coming down. Of course this is part of the fun of actually taking control of your trains – just make sure your grade isn’t too steep to maintain control!
Building Your Grade
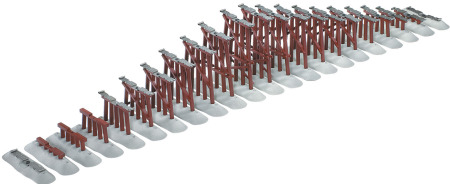
We have trestles for FasTrack too! 6-12037
Model railroaders have several options when it comes to building your hills. An easy way to get started is to use our graduated trestle sets for conventional or FasTrack. Spaced at every track joint, these will yield a 5% grade. You could lessen the grade by adding a second set of trestles and a 1/4″ shim beneath the base. Alternate between shimmed and standard trestles to climb at 1/4″/10″ instead of 1/2″ intervals.
For a more scenic grade you can cut the platform beneath the track and install risers on the benchwork underneath. Then simply apply a scenery shell to cover the gaps..
When building a grade, it is often easiest to start at the top and bottom first. Once you have established the end points, adjust the risers in between until you have a nice controlled grade with an even pitch.
Hopefully these simple tips will help your trains climb to new heights, and when it’s all over your railroad will still “make the grade.” Now, how about a look at a grade from the train’s perspective! Enjoy this view from on board a test train on our Customer Service layout: Pennsy S1 Climbs the Grade
Published 8/8/2012